Chapter 6: Working with Solutions
Table of Contents
- Introduction
- Jumping to steps
- Changing solutions
- Adding/deleting/renaming solutions
- Printing solutions
Introduction
To be able to work with multiple different solutions for the same sudoku concurrently is one of the most advanced features of HoDoKu (and it makes a lot of fun too!). The screenshots below show two very different solution paths for one and the same sudoku:
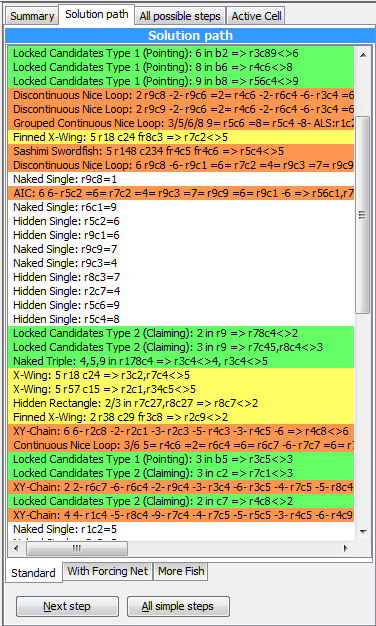
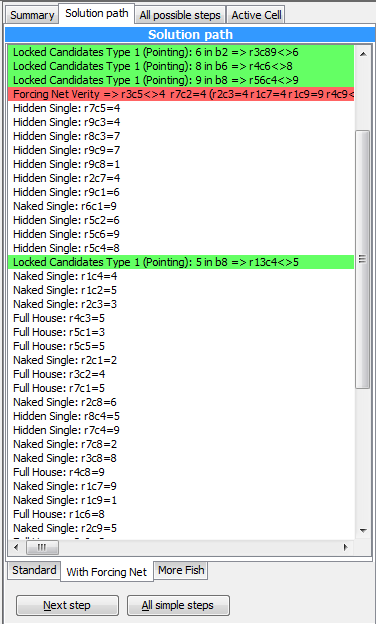
Both solutions work independently from each other. You can jump to any step in any solution with a simple mouse click, you can add, change, and delete solutions and if you save your sudoku to a file in hsol format all solutions are saved as well.
Jumping to steps
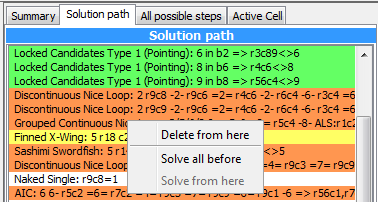
If you have a solution you can jump to any step by just double clicking it or by using the right mouse button to activate the context menu and choosing "Solve all before".
Both options solve the sudoku up until the step above the line you have chosen and highlight the chosen step.
This does work even if you have more than one solution for the same sudoku: Choose the solution by clicking the appropriate tab at the bottom of the step list. The sudoku will change according to your last selection in that particular solution. After that you can choose any step from the list as described above.
Changing solutions
Changing a solution is a three step process:
- Choose the first step you want to replace. Activate the context menu on that step and choose "Delete from here". The step and all that follow it will be deleted. At the end of the partial solution an "Incomplete" step will be added and the sudoku will be solved up to that point.
- Switch over to the "All possible steps" view and press "Find all steps". Browse through the steps until you find a suitable replacement for the deleted step. Highlight that step and click "Add to solution". The step will be added before the "Incomplete step" but not executed.
- Switch back to the "Solution path" view and double click the "Incomplete" step (or choose "Solve from here"). The sudoku will be solved till the end.
It is possible to add multiple steps at once, although you are responsible for the correct synchronization of the "All possible steps" and the "Solution path" views. To add multiple steps:
- When you have added a step it is still highlighted. Click "Execute" from the hint area
- Now click "Find all steps" again, add another step and execute it
- Repeat as needed
Note: It is possible to simulate a "batch" solve (more than one step executed against the same sudoku state) by adding multiple steps from the same "Find all steps" run. While the result will be correct the step highlighting could be incomplete which could be misleading.
Adding/Deleting/Renaming solutions
New solutions can be added by activating the popup menu on one of the tabs at the bottom of the step list and choosing "New solution".
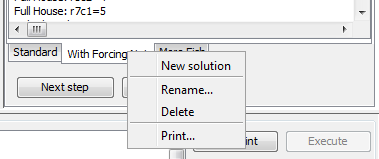
A new solution with a default name is created and the contents of the solution on whose tab the menu was activated is copied into the new solution.
To delete a solution just right click the corresponding tab and choose "Delete".
Solutions can be renamed using the context menu as well.
Please note: creating a new sudoku always replaces all solutions with the standard solution for the new sudoku without further warning. If you want to preserve your work please save it to disk first.
Printing solutions
Solution paths can be printed or copied to the clipboard. To do this, choose "Print..." from the tabs context menu.
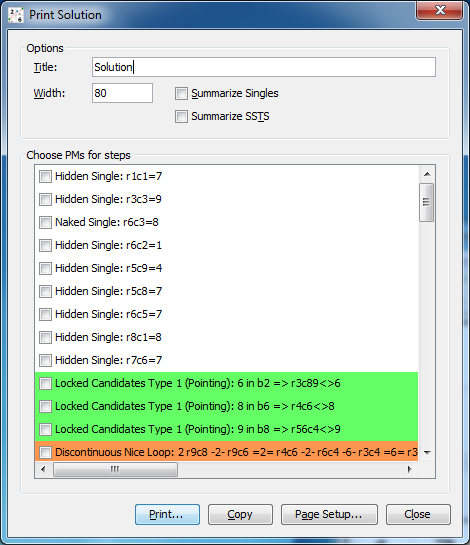
A dialog is displayed, which allows you to control the printer output:
- Title: The title of the solution path
- Width: The width of sudoku images in [mm] (for printer output only)
- Summarize Singles: When checked, consecutive singles are replaced by the line "Single till:" followed by the sudoku after the last single.
- Summarize SSTS: Same as "Summarize Singles", but all SSTS steps will be summarized.
- Choose PMs for steps: Lists all steps in the solution. Normally each step will be printed as text only. If a step is selected, an image of the sudoku in the correct state with the step highlighted is inserted into the ouput
- Print...: Opens a standard printer dialog and prints the solution path on the selected printer
- Copy: Copies a text only representation of the solution path to the clipboard
- Page Setup...: Opens the page setup dialog of the current operating system
- Close: Closes the dialog
Copyright © 2008-12 by Bernhard Hobiger
All material on this page is licensed under the GNU FDLv1.3.

